Administrator / 8 min read
Set up your organisation
Connect SharePoint and complete the Microsoft 365 setup checklist.
Updated 2 October 2026
Self-service or assisted setup
Self-service setup is free. We review your application, create your workspace and email your named administrator the setup invitation. Your team then follows the portal checklist and these guides.
Your Microsoft administrators approve application permissions and grant SharePoint access. Your RedlinerHQ administrator connects the originals and workspace libraries, assigns folders and reviewers, chooses protection settings, and checks a complete PDF or audio review with your files.
Optional assisted setup can help with library choices, configuration, troubleshooting and a guided first review. Email contact@redlinerhq.app for a separate quote. We agree its scope, price and payment timing before work starts. No call is required; a call can be arranged if useful. Your administrators still make the Microsoft approvals and access decisions.
Before you start
Use the setup invitation sent to your organisation’s administrator. Keep that invitation for the intended administrator; send reviewers the normal sign-in address after assigning their folders.
Have your Microsoft or Google Workspace administrator available to approve the application and grant storage access. Prepare an originals location and a separate workspace. Keep reviewers’ direct access to those locations consistent with your review policy.
Launch clients use Microsoft 365 sign-in and SharePoint. Google Workspace and Shared drive setup is planned for a later release. Email contact@redlinerhq.app to ask about future Google support. The Google instructions below are reference material for a future release; they do not mean Google is available at launch.
Connect originals and a workspace
- Sign in with the administrator account named in your invitation.
- Open Setup and follow the checklist.
- Approve the application with the appropriate organisation administrator, following the instructions shown in the app.
- Add a review library and choose the workspace. You can also manage these under Settings → Documents & access.
- Give the service access to the selected locations, then check they show Reachable.
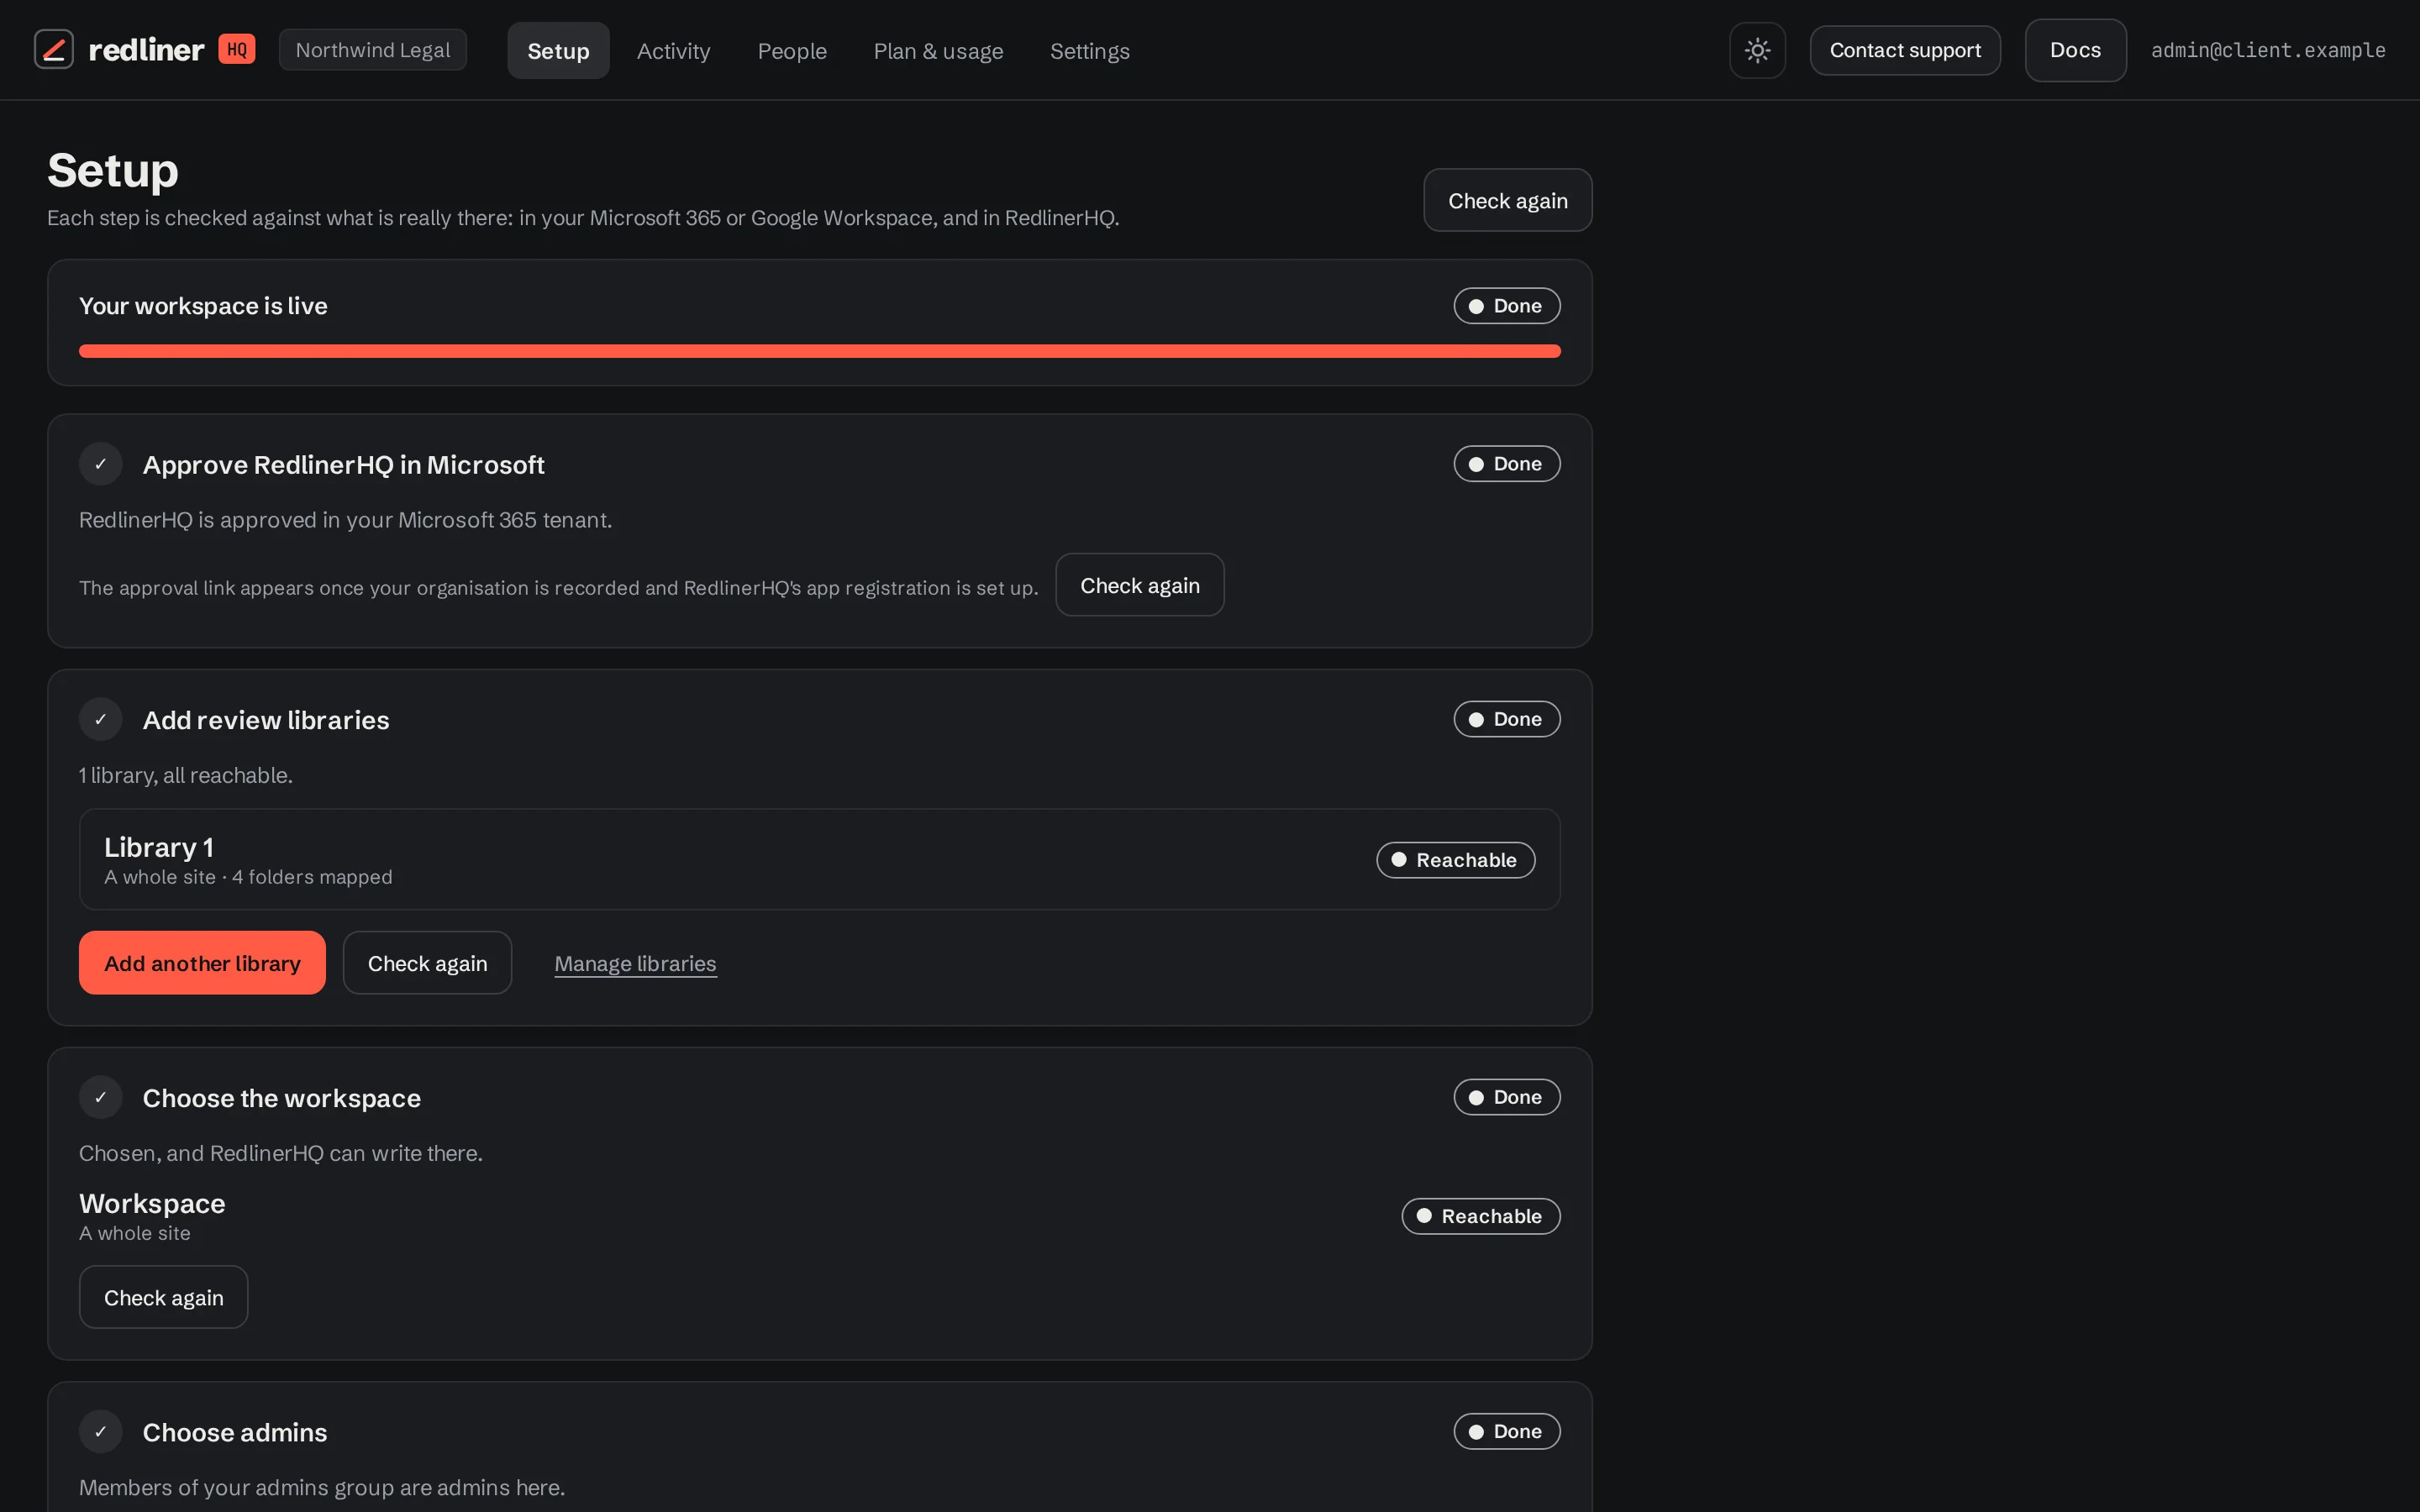
For SharePoint, follow the app’s location-specific read instructions for originals and write instructions for the workspace. Application approval and access to a particular location are separate steps. Your organisation’s administrator may need to complete both.
For Google, use separate Shared drives and add the service account shown in the app: Viewer on the originals drive, Content manager on the workspace drive. Reviewers sign in to RedlinerHQ; they do not need to become members of the originals drive to use assigned folders through the portal.
Choose folders and people
Continue with Documents & access: select review folders, add or import people, and assign a role. If you will also review, explicitly give your own administrator account access to a folder so it gains the Document Reviewer role.
Choose your client’s protection settings, check the portal address shown in Setup, and send that address to an assigned reviewer. Have them sign in and save a test review before wider rollout.
Check the first complete review
- The reviewer sees only their assigned folders.
- They can open a PDF or supported audio file and save a review.
- The administrator sees the supported events in Activity.
- Saved layers and permitted finished copies appear in the workspace; the originals remain unchanged.
- Any shared or private review setting behaves as expected for a second reviewer.
Plan & usage shows trial or subscription status and payment settings. The Setup checklist tells you when the workspace is live. Payment and technical setup are separate tasks.
Keep going with another guide, or return to your review.
Browse all docs